

I love pita bread because the ingredients are so simple, and the end result is so much better then the ones I find in the store. Sure, I usually burn my knuckles trying to whip the pans out of the oven so quickly, but that can be chalked up to excitement.
The past week as the temps start to cool I have been in more of a cooking mood. Something about fall and the leaves changing colors just makes me want to pull out my apron and channel Julia Child. So, without further ado:
The Cast:
1 tsp sugar
1 packet yeast (aprox 7 grams)
1 cup warm H2O
2 cups wheat flour
1 cup bread flour
1 tsp salt
1/4 cup olive oil
The Method:
In a small container, stir in the sugar and packet of yeast. Add in 1/2 cup of warm water. The sugar will help activate the yeast. Let this little Dexter experiment sit for about 10-15 minutes.
Meanwhile, in a large mixing bowl, add in the wheat and bread flour. You could just go with all bread flour, but to make it a tad bit more healthy, I went with the wheat option and it turned out brilliantly. Stir in the salt.

In the center of the flour make a little well and add in 1 cup of warm water.

Slowly begin stirring in the flour, working your way to the outside of the bowl. Note of what not to do: all my wooden spoons were in the sink to be washed. Make life easier and use a good ol' fashion wooden spoon during this part of the process, it is less likely to stick to the dough.

The yeast should be about ready and you can tell because it will be a tad bit bubbly on the top.

Now it is time to mix in the yeast/sugar mixture. It is going to be a tad bit lumpy, but no worries, everything will smooth itself out shortly.

In another bowl drizzle in some olive oil. Move it around to cover the bottom and outside edges of the bowl. In the end I probably used about 1/4 cup. Then take the dough and put in the olive oil filled bowl. The oil will help so that the dough does not stick to the sides, but it will also encourage it to rise upwards.

Cover the dough with saran wrap and then add a towel over the top. Store in a warm place for 45 minutes to an hour. For me that was over the dishwasher, where I was actually trying to clean things up a bit. Desperate times call for desperate measures when you suddenly run out of forks.

It's at this point when the dough is rising that I will generally make my hummus, but that portion is for another post. So this time around I am going to sit back, prop me feet up and enjoy Dancing with the Stars.

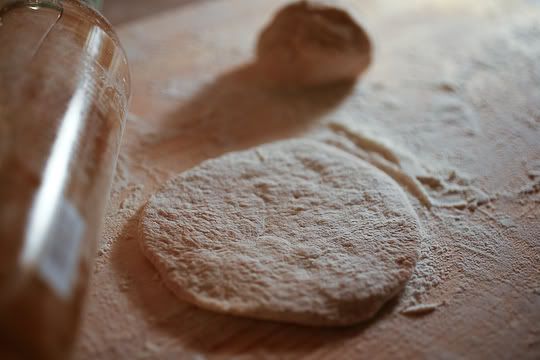
After the dough has had its breathing time, add flour to your surface. I like to use a wood cutting board. Contains the mess, a bit, and sticks a little less.
Unwrap the dough that has been resting (talk about taking it easy before a workout), it should have risen in the bowl, and come cleanly off the edges thanks to the olive oil.
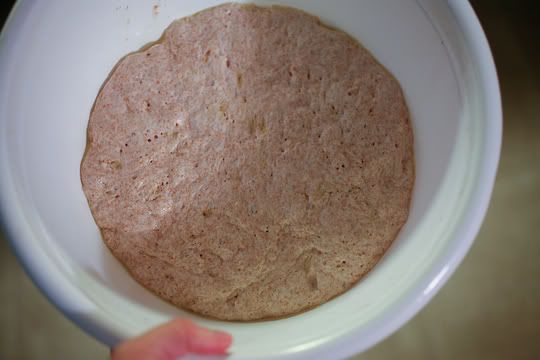


Unwrap the dough that has been resting (talk about taking it easy before a workout), it should have risen in the bowl, and come cleanly off the edges thanks to the olive oil.

Now it is time for the baking workout. Using the flour on the board, and generously adding some more as it kneads into the dough. The dough is ready when it no longer sticks to your hands or the board. If it is sticky, keep working it in. Took about 15 minutes for me to make this dough submissive to me and my muscular kneading arms. All this will help and make it nice and crusty.

Once the dough is thoroughly kneaded, break it off into small balls, rough the size of your fist. Take them and roll them out with a rolling pin (or wine bottle in my case -- white wines are rather nice for this). They should measure about 5-6 inches in diameter.

Now the part where I usually burn myself on the oven. It should be preheated to a whopping 500 degrees, and you want to make sure that the rack is on the lowest rung. I preheat the pan in the oven, so when it is ready, the bread bakes to moment it hits the metal.
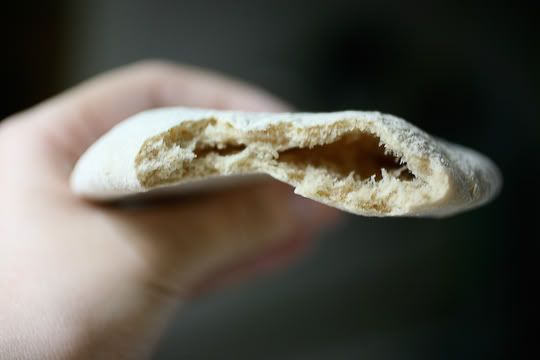
Add the dough to the sheet -- 2 to 3 pieces to the pan. Put in the oven for 4-5 minutes. It will start to balloon up and look like a whoopee cushion. Take them out and flip them, putting them back in for another two minutes. The pitas should be soft, so when the edges start getting a little browned, it it time to take them out.
Add the dough to the sheet -- 2 to 3 pieces to the pan. Put in the oven for 4-5 minutes. It will start to balloon up and look like a whoopee cushion. Take them out and flip them, putting them back in for another two minutes. The pitas should be soft, so when the edges start getting a little browned, it it time to take them out.

Place the pitas on a cooling rack. Using a knife, I deflate them a bit.

And when they are done, they are a nice, soft bread, ready for just about anything. In this case it was hummus, but I saved a few extras for the morning and spread them with Nutella and Almond Butter.
Store in a plastic bag letting out the air before closing it up so they stay nice and moist.
Store in a plastic bag letting out the air before closing it up so they stay nice and moist.
No comments:
Post a Comment